
24th Aug 2026
How to Tell if a Valve Is Open or Closed: Field Guide for PVC Systems
An open valve allows fluid to pass smoothly through a piping system, while a closed valve constricts or stops that flow. Visual inspection is typically the fastest way to identify valve position, but cues are dependent on the valve design; handles, stems, gearboxes, actuators, pressure readings, and flow measurements can all provide useful intel.
In this guide, we teach you how to tell if a valve is open or closed, explaining how to approach ball valves, butterfly valves, gate valves, globe valves, actuated valves, and check valves. These methods apply to plumbing, irrigation, pool, water-treatment, and light industrial PVC/CPVC systems.
Before operating an unfamiliar valve, make sure to confirm its type and check the markings on the valve body. If it controls a pressurized, hot, chemical, or otherwise hazardous line, follow your facility’s operating and safety procedures.
Ball Valves: Ball Valve Open Indicators
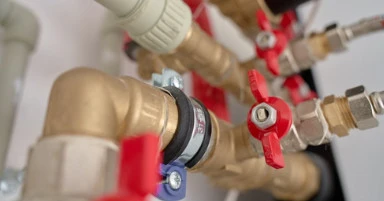
Ball valves offer one of the clearest visuals: the hollow passage through the internal ball lines up with the pipe when the valve is open. Rotating the handle one-quarter turn moves the solid side of the ball across the flow path, closing the valve. On lever-operated designs, the handle follows the direction of the internal passage:
- Handle parallel to the pipe: Open
- Handle perpendicular to the pipe: Closed
Which way is open and which way is closed on a valve with a lever? First, stand where you can clearly see both the handle and the connected pipe. A handle running in the same direction as the pipe usually means it’s open, while a handle crossing the pipe at 90 degrees usually means it’s shut.
If the handle has been removed, reinstalled, or damaged, check the OPEN/CLOSED markings and travel stops; a handle that stops halfway can indicate internal binding. If the handle is stiff, read our guide to loosening a ball valve without damage. You can also check out our compact and true-union PVC ball valve options.
Butterfly Valves: Butterfly Valve Position Cues
A butterfly valve uses a rotating disc inside of the valve body. When the disc aligns with the flow path, the valve is open. At 90 degrees to the flow path, the disc blocks the passage, so the valve is closed. On a typical lever-operated model, a handle parallel to the pipe indicates that it’s open, and a perpendicular handle means that it’s closed.
Most butterfly valve handles can latch into indexed positions for partial regulation. The angle estimates the disc position, but it doesn’t provide a measured flow rate. Pressure, fluid properties, and pipe size all affect flow, too.
Gearbox-operated butterfly valves use a handwheel and gear operator. Read the OPEN/CLOSED scale or pointer; the wheel can turn several times while the disc moves only 90 degrees, so its angle alone doesn’t determine valve position.
Gate Valves: Gate Valves and Stem Signs
Gate valves raise or lower an internal gate, either to open or block a straight flow path. Generally, they’re used for isolation rather than routine throttling.
Rising-stem models make the valve position visible. As the stem extends above the handwheel, the internal gate rises. That said, an extended stem means “open” and a lowered stem means “closed.” Globe valves also use rising stems, so you can follow the same visual cue on those designs.
Non-rising stems stay around the same exterior height, so rely on wheel direction, turn count, tags, or a position indicator. Handwheel valves often follow the “righty-tighty, lefty-loosey” rule, with clockwise closing and counterclockwise opening. However, some products operate in reverse, so check the arrows, labels, and instructions first.
Smaller gate valves can take roughly five to 10 turns, while larger units might require many more. Count from a known closed position and compare to the product specs. Stop when the gate reaches its seat, as excess force can damage the internal parts.
Actuated Valves: Actuated Valves and Verification
Electric, pneumatic, and hydraulic actuators count on a motor, compressed air, or pressurized fluid to move quarter-turn or multi-turn valves.
Read the actuator’s visual indicator first, since many units label the end positions OPEN and CLOSED and use a pointer, window, or color coding. Additionally, check the manual override before trusting the display, as it may move the valve independently of the latest command.
For critical lines, always confirm the position with a flow meter, pressure reading, or approved process measurement. While the indicator can report actuator travel, it’s not able to prove the expected flow.
Control System Feedback
PLC, DCS, HMI, or SCADA screens can display both the commanded and the actual valve position. Compare the control signal to feedback from open and closed limit switches, proximity sensors, or a positioner. If the command says “open” but the open limit switch never changes its state, investigate the actuator, linkage, sensor, and valve.
Carefully review the event log for recent commands, alarms, or travel failures. If there’s a mismatch, it might point to lost power, low air pressure, damaged wiring, a failed sensor, or a jammed valve.
Check Valves: Check Valves and Installation Signs
Check valves automatically open once fluid moves in the allowed direction. They then close once the flow reverses or drops below the operating threshold, successfully preventing backflow. They don’t have a manual handle that shows open or shut, so the body markings and system conditions carry more importance.
Begin with the arrow on the valve body. For starters, it should always point in the intended direction of flow. While the arrow confirms the installation direction, it can’t prove that the internal part is moving correctly.
Compare the upstream and downstream pressure; normal downstream flow suggests that the valve has opened, but reverse flow points to debris, wear, or a damaged seat. Check valves might stay closed if the system pressure cannot overcome its cracking pressure.
Flow Measurement and Flow Rate Methods
If visual cues leave any doubts, process evidence can address your concerns.
Read a downstream flow meter at a proper test point: stable flow supports an open reading, while zero flow reflects a closed valve, stopped pump, blockage, empty supply, or failed instrument.
Compare the upstream and downstream pressure gauges, as a large difference can reveal a closed or restricted valve. Similar readings can support an open position, depending on the pump status, elevation, demand, and gauge location.
Pipe temperature provides another piece of the puzzle for heated or chilled service, although insulation, ambient conditions, and stored heat can all affect the reading. When there’s no room for error, it’s best to use more than one method. Maxx Supply is here to help you identify compatible flow-measurement options.
Troubleshooting and Safety
Treat unknown valves as closed for planning purposes, but don’t bank on that assumption when it comes to personal protection. Follow your site’s energy-control procedure, isolate the line, stop connected equipment, relieve pressure, and wear proper PPE.
Debris, differential pressure, damage, or chemical buildup can make valves hard to move, but you should never force a handle or handwheel. Too much force can break a handle, crack the valve body, strip a stem, or create a leak.
If the indicator conflicts with the system readings, look for a loose handle, failed linkage, damaged gearbox, actuator alarm, blocked line, or faulty instrument. Contact Maxx Supply’s technical support team when the valve type, rating, or method is unclear.
Quick Field Inspection Checklist
- Determine the valve type and read all body markings.
- Check the lever or handle alignment against the pipe.
- Inspect the rising-stem movement or count handwheel turns.
- Read all actuator, gearbox, and control-system indicators.
- Compare the commanded position to the actual feedback.
- Confirm the flow with a meter, pressure readings, temperature, or approved system test.
- Stop as soon as the clues conflict or the valve resists normal operation.
Specifying PVC Valves for Projects
Always start with the function in mind. Ball and butterfly valves provide quarter-turn operation, gate valves are good for isolation, check valves address reverse flow, and diaphragm valves regulate compatible fluids. Additionally, make sure to match the material, pressure-temperature rating, connection, seal material, and chemical compatibility to your system.
Size the valve around the required flow, allowable pressure drop, and connection diameter. An undersized valve will restrict flow, while an oversized control valve will regulate inefficiently. Also account for service access, as union, threaded, socket, and flanged connections suit different installation and maintenance needs.
We carry check, ball, butterfly, diaphragm, and gate PVC valve types across sizes and connection styles. For sizing help, contact Maxx Supply to talk through your goals before ordering.